-
How to build parallel and isolated browser game agents for Reinforcement Machine Learning
Many Reinforcement Learning tutorials use the OpenAI Gym environment and its supported games to run on different algorithms. But what if you wanted to use Reinforcement Learning for your own environment? Usually you will no longer have ready-built APIs to interact with the environment, the environment itself may be slower than Gym’s games, making it difficult to take the millions of steps for weight updates necessary to train agent models.
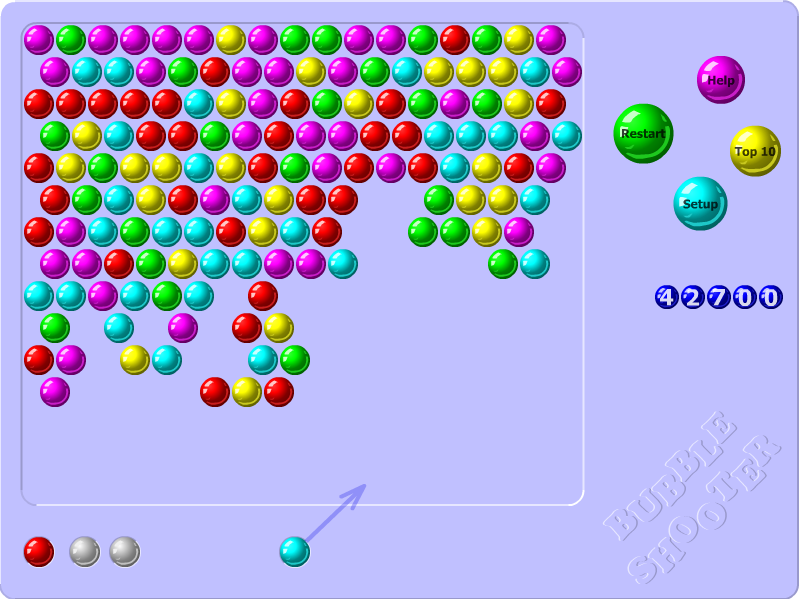
Lately I’ve been exploring RL for a Bubble Shooter game - an Adobe Flash based game running in the browser. Previously I would run the game in my primary browser, and use Pynput library to control my computer’s mouse and/or keyboard. This works for a single game instance, but is slow - one step taking 2-5 seconds. So running multiple game instances is necessary to speed up learning, but the original approach of controlling device’s primary mouse or keyboard does not scale that way easily.
What helped to speed up the learning process was to use Selenium+Firefox to run the isolated game instances, allowing for straightforward controls for each instance without blocking the device’s primary controls, and running every game instance and the RL agent in separate processes.
Selenium provides some key functionality necessary for this to work:
- An easy way to take screenshots of DOM elements for the Vision module to use
- An easy way to send mouse/keyboard inputs to a specific DOM element
- Allows running Flash based applications
Game instance isolation with Selenium and Firefox
Selenium Python driver can be installed with
pip install selenium. Firefox will also require ageckodriverpackage to be available in your$PATH: How to install geckodriverFlash is abandoned and modern browsers no longer include it. On Ubuntu
browser-plugin-freshplayer-pepperflashneeds to be installed to get flash running:sudo apt-get install browser-plugin-freshplayer-pepperflash.In the Selenium’s Firefox webdriver instance Flash can be enabled with a profile preference:
from selenium import webdriver
# ...
profile = webdriver.FirefoxProfile()
profile.set_preference("plugin.state.flash", 2)
driver = webdriver.Firefox(profile)
The webpage with the flash game can be opened with:
driver.get('https://www.kongregate.com/games/Paulussss/bubbles-shooter')The correct DOM element can be found with:
game_board_element = driver.find_element_by_tag_name('embed')Mouse movements and clicks are performed using
ActionChainsmechanism. It’s a convenient wrapper and will wait for actions to complete before returning:target_x, target_y = (50, 50) # some x, y coordinates action_chains = webdriver.common.action_chains.ActionChains(driver) action_chains.move_to_element_with_offset(game_board_element, target_x, target_y) action_chains.click() action_chains.perform()Game board screenshots can be taken with
game_board_element.screenshot_as_png. This will return a Base64 encoded PNG image, which we can turn into an OpenCV compatible Numpy array:import numpy as np import cv2 # ... base64_png = game_board_element.screenshot_as_png file_bytes = np.asarray(bytearray(base64_png), dtype=np.uint8) decoded_image = cv2.imdecode(file_bytes, cv2.IMREAD_COLOR) rect = game_board_element.rect (x, y, w, h) = (int(rect['x']), int(rect['y']), int(rect['width']), int(rect['height'])) cropped_image = decoded_image[y:y+h, x:x+w] import namedtuple Board = namedtuple('Board', ['x', 'y', 'w', 'h', 'screen']) board = Board(x, y, w, h, cropped_image)That finds the position of the game board, its dimensions and its contents - all that’s needed for further processing and interaction.
Parallelizing game instances with multiprocessing
Using threads is an option, but because the goal is to run many game instances (24 in my case), I went with Processes instead to make use of all CPU cores.
The distribution is as follows:
- Main Supervisor, responsible for starting the agents and workers, managing queues
- Agent process, responsible for running and training the RL model
- N trainer/player processes, responsible for running Selenium and game instances.
Inter-process communication will be performed through Queue instances, as inspired by Akka’s Actors.
1. Agent worker
from multiprocessing import Process, Queue

class AgentProcess:
  def __init__(self, config, my_queue, worker_queues):
    self.agent = Agent(config) # create our agent
    self.my_queue = my_queue
    self.worker_queues = worker_queues

  def send_message(self, worker, message):
    self.worker_queues[worker].put_nowait(message)

  def work(self):
    try:
      while True:
        message = self.my_queue.get(block=True, timeout=60)
        if message['command'] == 'act':
          self.send_message(message['worker'], self.agent.act(message['state']))
        else:
          # Add other Agent actions
    except queue.Empty:
      return False

def agent_worker(config, my_queue, worker_queues):
  agent = AgentProcess(config, my_queue, worker_queues)
  return agent.work()
The idea is that the
Agentprocess will keep waiting for messages from thePlayerworkers with new states of the game board. Then it will ask theAgentto make a move, and will respond back to the correctPlayerworker about which action it should take.In this case the Agent has one queue to receive messages from all
Playerworkers, but everyPlayerwill have their own queues to receive messages from theAgent.Since processes are isolated, the
Agentprocess will be able to have its own Tensorflow model instance and related resources.2. Player worker
The player worker is responsible for running the game environment, and just needs to ask the
Agentwhich action it should make at certain points.class PlayerProcess: def __init__(self, agent_queue, my_queue, worker_name): self.agent_queue = agent_queue self.my_queue = my_queue self.worker_name = worker_name def send_to_agent(self, message={}): message['worker'] = self.worker_name self.agent_queue.put_nowait(message) def get_from_agent(self): return self.my_queue.get(block=True) def start(self): self.browser = SeleniumBrowser() self.browser.setup() def stop(self): self.browser.cleanup() def play(self, episodes, steps): for e in range(episodes): state = self.browser.get_game_board() for step in range(steps): self.send_to_agent({ 'command': 'act', 'state': state }) action = self.get_from_agent() self.browser.move_to(action, 400) def player_worker(config, agent_queue, my_queue, my_name): player = PlayerProcess(agent_queue, my_queue, my_name) player.start() player.play(config['episodes'], config['steps']) player.stop()This
PlayerProcessis simplified to show the main ideas.But in English all this does is gets the Selenium instance to get the game board state, asks the
Agentto choose an action based upon the state, and asks the Selenium instance to perform the action.3. Training supervisor
The training supervisor needs to start all of the relevant processes, queues. It also starts training, and releases all resources afterwards.
class Supervisor:
  def __init__(self, config, total_players=2):
    self.total_players = total_players
    self.agent_queue = Queue()
    self.worker_queues = [Queue() for _ in range(total_players)]
    self.config = config
    self.agent = Process(target=agent_worker, args=(config,))
    self.workers = [Process(target=player_worker, args=(config, self.agent_queue, self.worker_queues[name]) for name in range(total_players)]

  def start(self):
    self.agent.start()
    for worker in self.workers:
      worker.start()

  def wait_to_finish(self):
    for worker in self.workers:
      worker.join()
    self.agent.terminate()
And to actually run the supervisor, all player instances and start the playing process:
config = #... - some config
if __name__ == '__main__':
  supervisor = Supervisor(config, total_players=10)
  supervisor.start()
  supervisor.wait_to_finish()
Once executed, this should start a bunch of browsers:
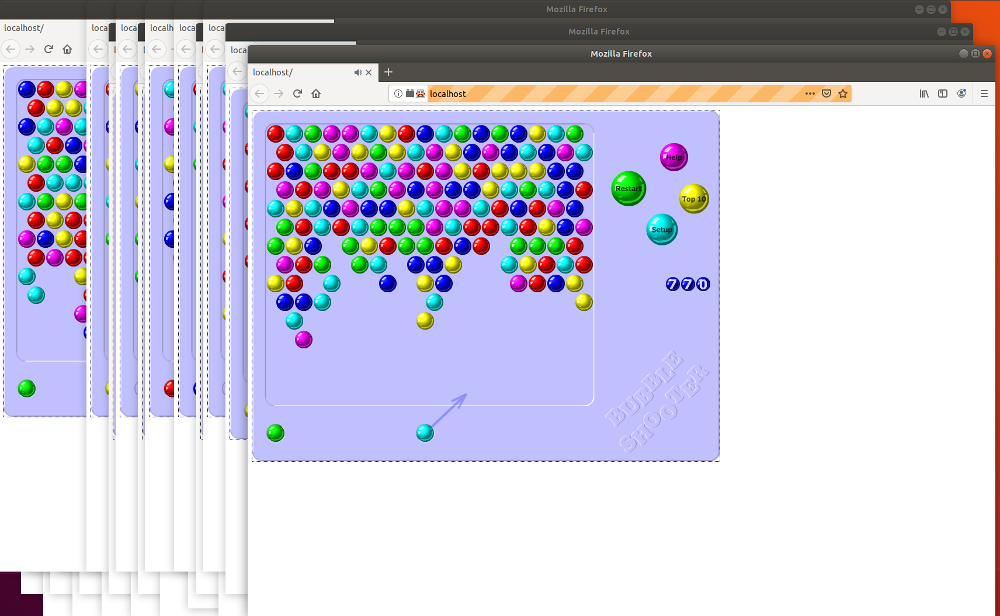
I’m using this approach to run 24 game instances for my Q-learning process for Bubble Shooter. If you’d like to see it in action, you can find it on GitHub.
-
How to solve a puzzle game with Python and Z3 Theorem prover
This post shows how Microsoft’s Z3 Theorem prover can be used to solve the Puzlogic puzzle game. We will replace the previous brute-force approach used in my puzlogic-bot with one that uses Z3.
Over last few posts we walked through building up puzlogic-bot: building the basic solver, the vision component using OpenCV, hooking up mouse controls with Pynput. As I’m learning to use Z3, the Z3 puzzle solver implementation would be an interesting practical exercise.
TL;DR: you can find the final solver code on Github.
Z3 is a theorem prover made by Microsoft. The SMT (Satisfiability modulo theories) family of solvers build up on SAT (Boolean satisfiability problem) family of solvers, providing capabilities to deal with numbers, lists, bit vectors and so on, instead of just boolean formulas.
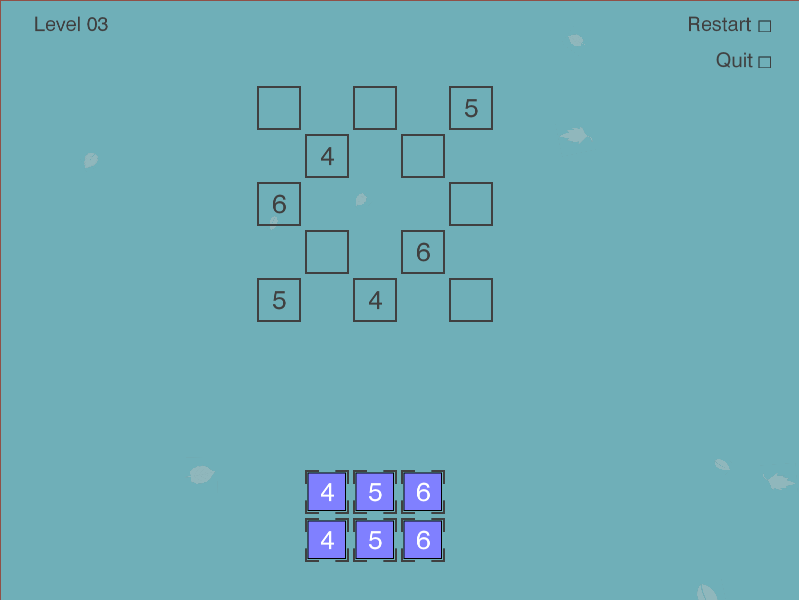
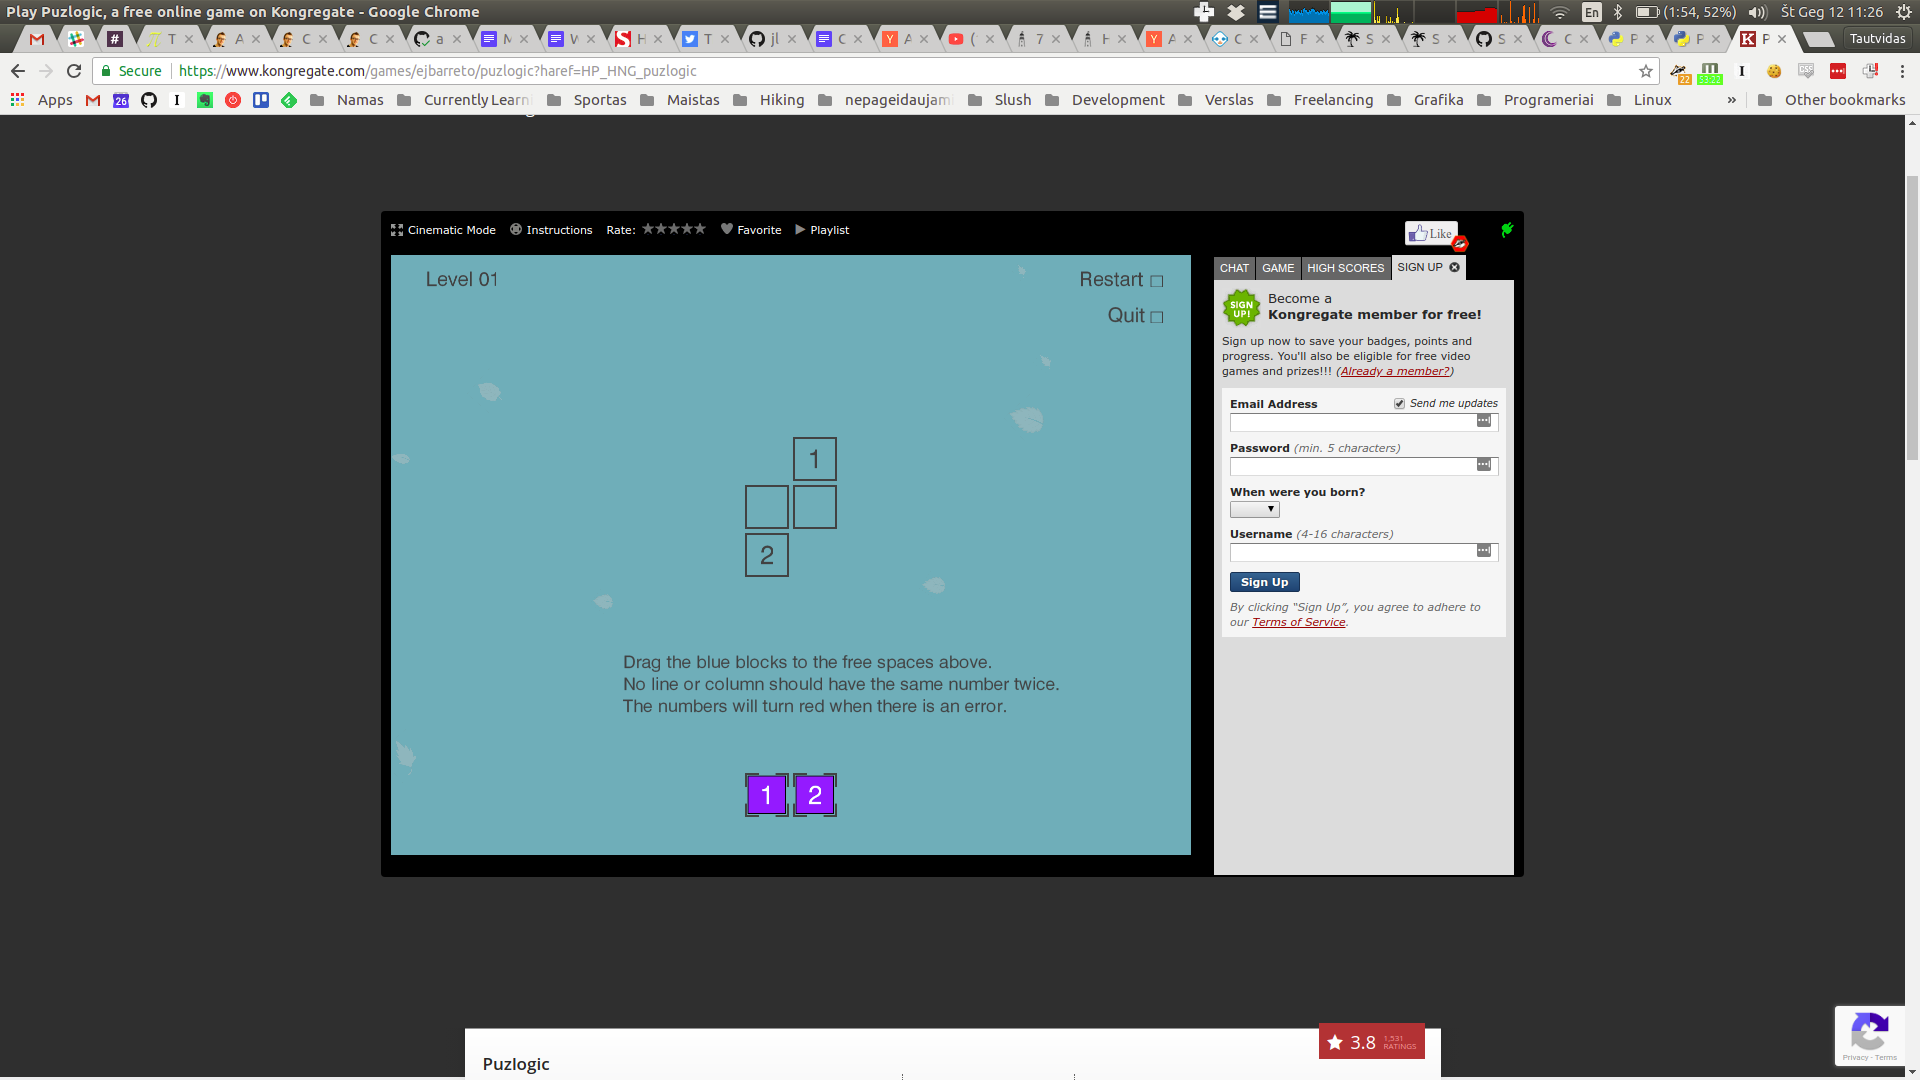
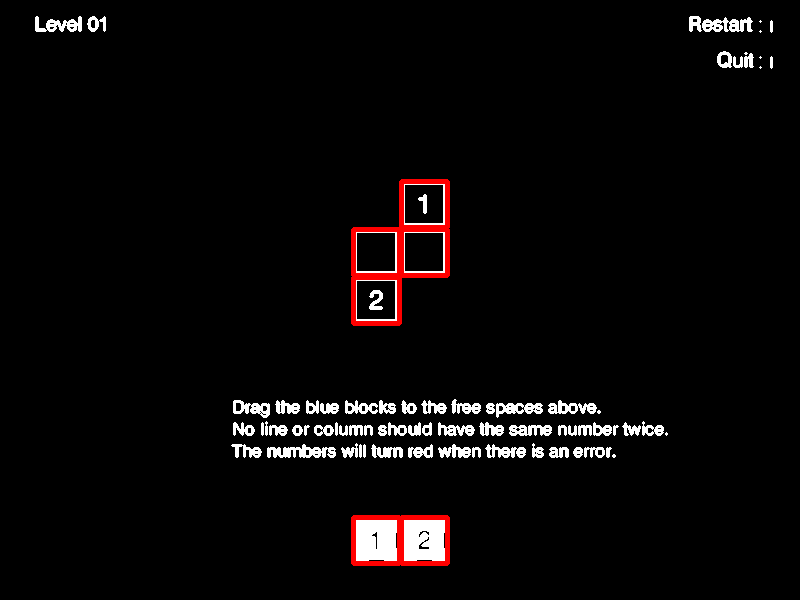
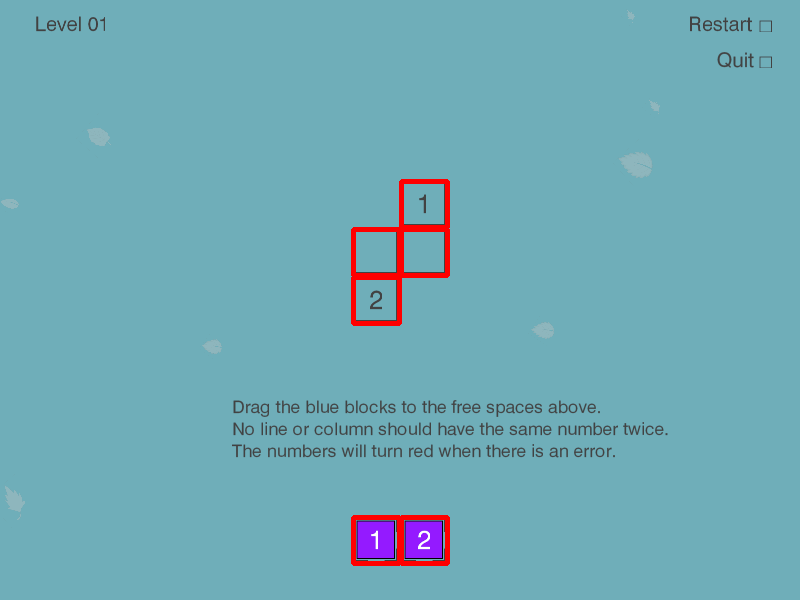
Puzlogic is a number-based puzzle game. The goal of the game is to insert all given numbers into the board such that all rows and columns have unique numbers, and where a target sum is given - the row or column sums up to a given value.
Basics of Z3
“SAT/SMT by Example” by Dennis Yurichev is a great book to help beginners pick up Z3, and it was the inspiration for this post.
At school we all worked through equation systems like:
3x + 2y - z = 1
2x - 2y + 4z = -2
-x + 0.5y - z = 0
Z3 can be thought of as a constraint solver. Given a set of constraints, it will try to find a set of variable values that satisfy the constraints. If it can find a valid set of values - it means the constraints (and thus the theorem) is satisfiable. If not - it is not satisfiable.
The most basic example given in Yurichev’s book is:
from z3 import *

x = Real('x')
y = Real('y')
z = Real('z')

s = Solver()
s.add(3*x + 2*y - z == 1)
s.add(2*x + 2*y + 4*z == -2)
s.add(-x + 0.5y - z == 0)
print(s.check())
print(s.model())
Executing it outputs:
sat
[z = -2, y = -2, x = 1]
Here each equation can be considered as a constraint: a sum of variable values have to sum up to a certain value, satisfying the equation. Z3 is way more powerful than that, as evident by Z3py reference, but for the Puzlogic puzzle this is actually sufficient.
What we need next is how to describe the given puzzle as a set of constraints for use in Z3.
Solving Puzlogic puzzles
To quickly recap, the rules of the game are as follows:
- All numbers on a given row or column must be unique
- When a sum target is given for a given row or column, all cells in it must sum up to target sum
- All purple pieces at the bottom of the game board must be used to fill the game board
As established in the previous post, the game board is defined as a sparse matrix: a list of cells with
x, ycoordinates and a value. E.g.:board = [ # (row, column, value) (0, 0, 0), (0, 3, 6), (1, 0, 2), (1, 1, 0), (1, 3, 0), (2, 0, 0), (2, 2, 5), (2, 3, 0), (3, 0, 0), (3, 3, 1) ]A value of zero is treated as an empty cell.
Purple game pieces are expressed just as a list of numbers:
[1, 2, 3, 4, 5, 6].While target sums can be expressed as
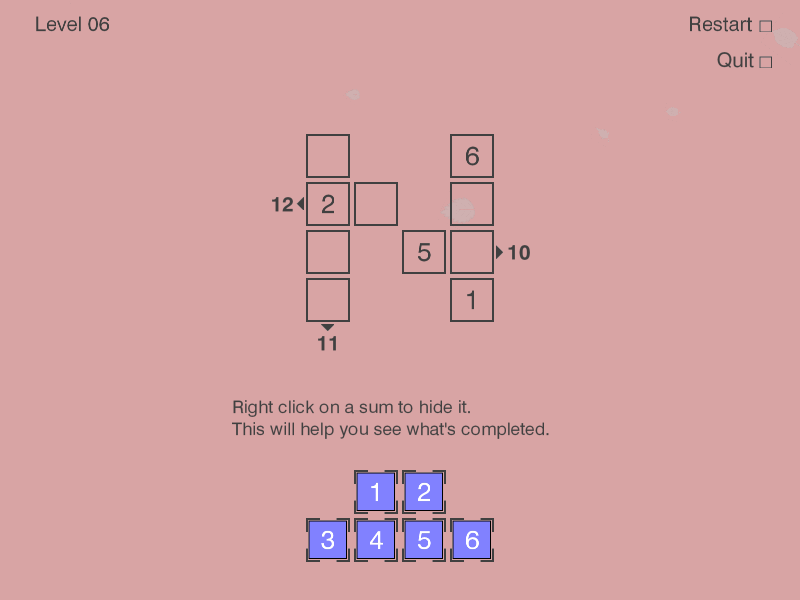
(dimension, index, target_sum)tuples:target_sums = [ # (dimension, index, target_sum (0, 1, 12), # second row sums up to 12 (0, 2, 10), # third row sums up to 10 (1, 0, 11) # first column sums up to 11 ]Dimension of
0marks a row, while1marks a column.For the implementation there are 5 constraints to cover:
- Limit values of pre-filled cells to the given values. Otherwise Z3 would assign them to some other values.
- Allow empty cells to get values only of available pieces.
- Require that there would be no duplicate values in any of the rows or columns.
- If there are any sum targets specified for given rows or columns, require them to be satisfied.
- Require that each purple game piece would be used only once.
0. Z3 variables
First, the
boardis extended by creating a Z3 variable for each cell to make it easier to apply constraints later on:def cell_name(self, row, column): return 'c_%d_%d' % (row, column) def solve(self): solver = Solver() # Create z3 variables for each cell extended_board = [(row, column, value, Int(self.cell_name(row, column))) for (row, column, value) in board]Both default values and the purple game pieces are integers, hence the
Intvariable type.1. Pre-filled variables
So far Z3 would be able to assign any integer to any of the variables we created so far. We will constrain the cells to use the already specified value where it is specified.
As mentioned before, in the
boardsparse matrix the value of0indicates an empty cell, so we initialize values for cells with values greater than 0:def is_cell_empty(self, value): return value == 0 def set_prefilled_cell_values(self, board): return [cell == value for (_, _, value, cell) in board if not self.is_cell_empty(value)]The
cell == valueis going to generate an expression object of typez3.z3.BoolRef, ascellhere is a variable we created above with typeInt, andvalueis a constant.E.g. for the cell
(0, 3, 6)the expression would beInt('c_0_3') == 6).2. Empty cells can gain a value from any of the pieces
Having available pieces
[1, 2, 3, 4, 5, 6], we want the following constraint for each of the empty cells:cell == 1 OR cell == 2 OR cell == 3 OR cell == 4 OR cell == 5 OR cell == 6def set_possible_target_cell_values(self, board, pieces): constraints = [] for (row, column, value, cell) in board: if self.is_cell_empty(value): any_of_the_piece_values = [cell == piece for piece in pieces] constraints.append(Or(*any_of_the_piece_values)) return constraintsThis returns a list of constraints in the format:
constraints = [
  Or(c_0_0 == 1, c_0_0 == 2, c_0_0 == 3, c_0_0 == 4, c_0_0 == 5, c_0_0 == 6),
  Or(c_1_1 == 1, c_1_1 == 2, c_1_1 == 3, c_1_1 == 4, c_1_1 == 5, c_1_1 == 6),
  # ...
]
You may notice that this allows cells on the same row or column to have a common value. This will be fixed by constraint 3. This also allows the same piece to be used in multiple cells, we’ll fix it with constraint 4.
3. No duplicates in rows or columns
def require_unique_row_and_column_cells(self, board): return [ c1 != c2 for ((x1, y1, _, c1), (x2, y2, _, c2)) in itertools.combinations(board, 2) if x1 == x2 or y1 == y2]itertools.combinations(), given a list of[A, B, C, ...]will output combinations[AB, AC, BC, ...]without repetitions. E.g.c_0_0 != c_0_3,c_0_0 != c_1_0,c_0_0 != c_2_0and so on.We use it to make sure that no cells with a common row or column index have the same value. Instead of manually iterating over each cell combination, we could’ve used Distinct(args) expression for each row and column.
4. Satisfying sum targets
Any column or row may have a sum target that its pieces should sum up to.
  def match_sum_requirements(self, board, sum_requirements):
    constraints = []
    for (dimension, index, target_sum) in sum_requirements:
      relevant_cells = [cell[3] for cell in board if cell[dimension] == index]
      constraints.append(sum(relevant_cells) == target_sum)

    return constraints
It’s a fairly straightforward sum of relevant cells. E.g. for the
(0, 1, 12)sum target, the constraint expression would beSum(c_1_0, c_1_1, c_1_3) == 125. All pieces are used once
Here that can be ensured by summing up pieces used in empty cells, and it should match the sum of pieces given originally. Just checking for unique values is insufficient, as on some levels there may be multiple pieces with the same value, e.g.
[4, 5, 6, 4, 5, 6].def target_cells_use_all_available_pieces(self, board, pieces): empty_cells = [cell for (_, _, value, cell) in board if self.is_cell_empty(value)] return [sum(empty_cells) == sum(pieces)]Putting it all together
Now that we have methods that generate constraint expressions, we can add them all to the solver and format the output to make it look more readable:
constraints = \
  self.set_prefilled_cell_values(extended_board) + \
  self.set_possible_target_cell_values(extended_board, pieces) + \
  self.require_unique_row_and_column_cells(extended_board) + \
  self.match_sum_requirements(extended_board, sum_requirements) + \
  self.target_cells_use_all_available_pieces(extended_board, pieces)

for constraint in constraints:
  solver.add(constraint)

if solver.check() == sat:
  model = solver.model()
  return [
    (row, column, model[cell].as_long())
      for (row, column, value, cell) in extended_board
      if self.is_cell_empty(value)
  ]
else:
  return False
It’s worth noting that
solver.check()may return eitherz3.satorz3.unsat. If it is satisfiable,solver.model()will contain a list of values:# solver.model() [c_1_1 = 6, c_3_0 = 5, c_2_3 = 2, c_1_3 = 4, c_0_0 = 1, c_2_0 = 3, c_3_3 = 1, c_2_2 = 5, c_1_0 = 2, c_0_3 = 6]The values, however, are still Z3 objects, so e.g. an
Int()object value may need to be converted into a primitiveintviaas_long()method.Once a model is solved, we also nicely format the return values in the form of:
solution = [
  # (row, column, expected_piece_value)
  (0, 0, 1),
  (1, 1, 6),
  (1, 3, 4),
  (2, 0, 3),
  (2, 3, 2),
  (3, 0, 5)
]
The steps, if done by the human, will solve the puzzle.
The final set of constraints for level 6 was:
[
  # 1. Pre-filled cell values
  c_0_3 == 6, c_1_0 == 2, c_2_2 == 5, c_3_3 == 1,

  # 2. Possible values for empty cells
  Or(c_0_0 == 1, c_0_0 == 2, c_0_0 == 3, c_0_0 == 4, c_0_0 == 5, c_0_0 == 6),
  Or(c_1_1 == 1, c_1_1 == 2, c_1_1 == 3, c_1_1 == 4, c_1_1 == 5, c_1_1 == 6),
  Or(c_1_3 == 1, c_1_3 == 2, c_1_3 == 3, c_1_3 == 4, c_1_3 == 5, c_1_3 == 6),
  Or(c_2_0 == 1, c_2_0 == 2, c_2_0 == 3, c_2_0 == 4, c_2_0 == 5, c_2_0 == 6),
  Or(c_2_3 == 1, c_2_3 == 2, c_2_3 == 3, c_2_3 == 4, c_2_3 == 5, c_2_3 == 6),
  Or(c_3_0 == 1, c_3_0 == 2, c_3_0 == 3, c_3_0 == 4, c_3_0 == 5, c_3_0 == 6),

  # 3. Unique values in rows and columns
  c_0_0 != c_0_3, c_0_0 != c_1_0, c_0_0 != c_2_0, c_0_0 != c_3_0,
  c_0_3 != c_1_3, c_0_3 != c_2_3, c_0_3 != c_3_3,
  c_1_0 != c_1_1, c_1_0 != c_1_3, c_1_0 != c_2_0, c_1_0 != c_3_0,
  c_1_1 != c_1_3,
  c_1_3 != c_2_3, c_1_3 != c_3_3,
  c_2_0 != c_2_2, c_2_0 != c_2_3, c_2_0 != c_3_0,
  c_2_2 != c_2_3,
  c_2_3 != c_3_3,
  c_3_0 != c_3_3,

  # 4. Row/column sum targets
  0 + c_1_0 + c_1_1 + c_1_3 == 12,
  0 + c_2_0 + c_2_2 + c_2_3 == 10,
  0 + c_0_0 + c_1_0 + c_2_0 + c_3_0 == 11,

  # 5. Ensuring that all pieces have been used once
  0 + c_0_0 + c_1_1 + c_1_3 + c_2_0 + c_2_3 + c_3_0 == 21
]
Final thoughts
The puzlogic-bot project is able to use the Z3 based solver for first few levels, but that’s only because the Vision component is not able to read the row/column target sums correctly. As we have seen in the example, the Z3-based solver has no issues dealing with target sums in further levels.
I found it rather surprising just how approachable Z3 was for a newbie. The puzzle problem perhaps was primitive, but the only difficulty was to not get lost in the constraint definitions the puzzle required.
You can find the final code of the solver on Github. If you are curious how
puzlogic-botwas built, I have a series of posts on it too.How do you use or would use constraint solvers?
-
Debugging TLA+ specifications with state dumps
TLA+ (Temporal Logic of Actions) is a formal specification language, used for specifying and checking systems and algorithms for corectness. As I’m further exploring it (see my last post about modelling subscription throttling), I’m ocasionally running into situations where I think there may be an issue with the current specification as they unexpectedly do not terminate, but without a clear reason.
In programming languages it is common to fire up a debugger and step through the program execution, inspecting instruction flow and variable values. With TLC there is no clear way to do so, at least I was unable to find any. TLC will only provide an error trace for errors it does find, however if TLC execution does not terminate this is of little use.
In TLC Command-line options I found the
-dump <file>option, which dumps out every reached state into the specified file. There is no equivalent GUI option in “TLA+ Toolbox’s” TLC options, so it has to be specified as a TLC command line parameter inModel > Advanced Options > TLC Options > TLC command line parameters.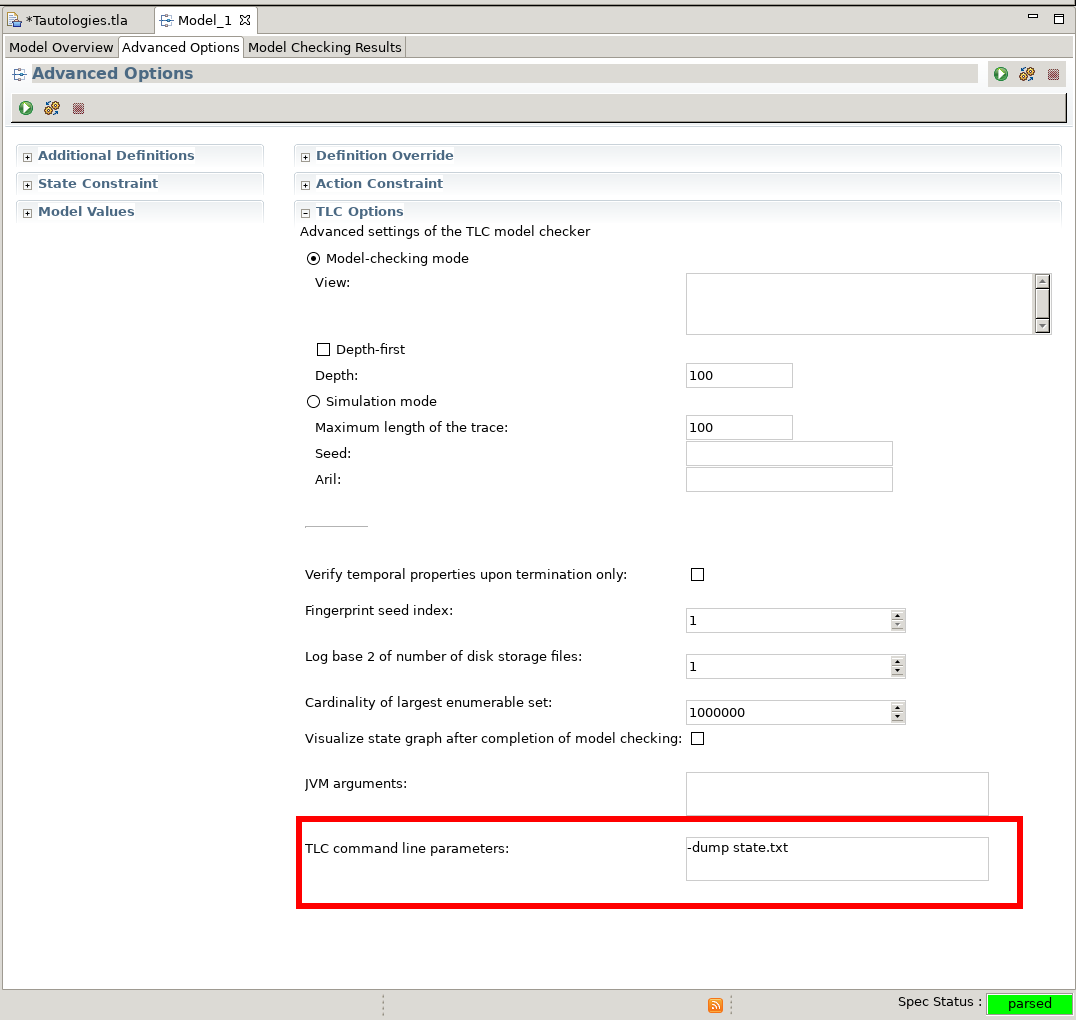
The dump file itself consists of plaintext state values, so it is certainly human readable. For a tautology checking spec when run with the
-dump states.txt:VARIABLES P, Q F1(A, B) == A => B F2(A, B) == ~A \/ B ValuesEquivalent == F1(P, Q) <=> F2(P, Q) Init == /\ P \in BOOLEAN /\ Q \in BOOLEAN Next == /\ P' \in BOOLEAN /\ Q' \in BOOLEAN Spec == Init /\ [][Next]_<<P, Q>>The dump file in
<SPEC_PATH>/<SPEC_NAME>.toolbox/<MODEL_NAME>/states.txt.dumpcontains:State 1: /\ P = FALSE /\ Q = FALSE State 2: /\ P = FALSE /\ Q = TRUE State 3: /\ P = TRUE /\ Q = FALSE State 4: /\ P = TRUE /\ Q = TRUEIt’s a low-tech approach, it still is difficult to follow execution in cases with many states, but it has helped me get a better grasp on which states TLC is exploring and clarify issue suspicions. One thing to note is that depending on the size of a state and the number of states, the filesize may quickly grow into gigabytes range, so in certain cases it may be impractical to dump all distinct states, requiring early termination of TLC.
This is a very basic method, but if you have better ways of debugging specs themselves - please do let me know!
-
Adding controls and bot logic - Part 3 of Solving Puzlogic puzzle game with Python and OpenCV
In the the second part of the series we added the Vision component for the Puzlogic puzzle solving bot.
In this post we will add a mouse controller as well as handle basic bot logic to get the bot actually solve some of the beginner puzzles.
Planning
For controls, as before in the Burrito Bison bot, here we only need the mouse. So I’ll reuse the component, which uses
pynput` for mouse controls.For the bot logic, we’ll need to use the
Solver,VisionandControlscomponents, making use of all 3 to solve a given puzzle. In this case the bot will rely on the human to set up the game level, handle game UIs, while bot itself will be responsible only for finding the right solution and moving game pieces to the target cells.Implementation
Mouse Controller
As mentioned before, we’ll use
Pynputfor mouse controls. We start with the basic outline:import time from pynput.mouse import Button, Controller as MouseController class Controller: def __init__(self): self.mouse = MouseController() def move_mouse(self, x, y): # ... def left_mouse_drag(self, from, to): # ...For
move_mouse(x, y), it needs to move the mouse to the given coordinate on screen.Pynput would be able to move the mouse in a single frame just by changing
mouse.positionattribute, but for me that caused problems in the past, as the game would simply not keep up and may handle such mouse movements unpredictably (e.g. not registering mouse movements at all, or moving it only partially). And in a way that makes sense. Human mouse movements normally take several hundred milliseconds, not under 1ms.To mimic such gestures I’ve added a way to smooth out the mouse movement over some time period, e.g.
100ms, by taking a step every so often (e.g. every2.5msin40steps).def move_mouse(self, x, y): def set_mouse_position(x, y): self.mouse.position = (int(x), int(y)) def smooth_move_mouse(from_x, from_y, to_x, to_y, speed=0.1): steps = 40 sleep_per_step = speed // steps x_delta = (to_x - from_x) / steps y_delta = (to_y - from_y) / steps for step in range(steps): new_x = x_delta * (step + 1) + from_x new_y = y_delta * (step + 1) + from_y set_mouse_position(new_x, new_y) time.sleep(sleep_per_step) return smooth_move_mouse( self.mouse.position[0], self.mouse.position[1], x, y )The second necessary operation is mouse dragging, which means pushing the left mouse button down, moving the mouse to the right position and releasing the left mouse button. Again, all those steps can be programatically performed in under
1ms, but not all games can keep up, so we’ll spread out the gesture actions over roughly a second.def left_mouse_drag(self, start, end): delay = 0.2 self.move_mouse(*start) time.sleep(delay) self.mouse.press(Button.left) time.sleep(delay) self.move_mouse(*end) time.sleep(delay) self.mouse.release(Button.left) time.sleep(delay)And that should be sufficient for the bot to reasonably interact with the game.
Bot logic
The bot component will need to communicate between the other 3 component. For bot logic there are 2 necessary steps:
Solvercomponent needs to get information fromVisionabout available cells, their contents, available pieces in order forSolverto provide a solution.- Take the solution from
Solver, and map its results into real-life actions, by moving the mouse viaControlsto the right positions.
We start by defining the structure:
class Bot:
    """ Needs to map vision coordinates to solver coordinates """

    def __init__(self, vision, controls, solver):
        self.vision = vision
        self.controls = controls
        self.solver = solver
Then we need to a way feed information to
Solver. But we can’t just feed vision information straight into the solver (at least not in the current setup), as it both work with slightly differently structured data. So we first will need to map vision information into structures thatSolvercan understand.def get_moves(self): return self.solver.solve(self.get_board(), self.get_pieces(), self.get_constraints())self.vision.get_cells()returns cell information in a list of cells of formatCell(x, y, width, height, content), butSolverexpects a list of cells in format of(row, column, piece):def get_board(self): """ Prepares vision cells for solver """ cells = self.vision.get_cells() return list(map(lambda c: (c.x, c.y, c.content), cells))self.get_pieces()expects a list of integers representing available pieces. However, vision information returnsCell(x, y, width, height, content). So we need to map that as well:def get_pieces(self): """ Prepares vision pieces for solver """ return list(map(lambda p: p.content, self.vision.get_pieces()))self.get_constraints()currently is not implemented inVisioncomponent, and instead returns an empty list[]. We can just pass that along to theSolverunchanged for now, but will likely have to change it once constraints are implemented.def get_constraints(self): """ Prepares vision constraints for solver """ return self.vision.get_constraints()Now that we have the solution in the form
[(target_row, target_column, target_piece_value), ...], we need to map that back into something that could work for the graphical representation. We already treatxandyof each cell as the “row” and “column”, which works because all cells are arranged in a grid anyway. Now we only need to find which available pieces to take from which cell, and move those to respective target cells.def do_moves(self): moves = self.get_moves() board = self.vision.get_game_board() available_pieces = self.vision.get_pieces() def get_available_piece(piece, pieces): target = list(filter(lambda p: p.content == piece, pieces))[0] remaining_pieces = list(filter(lambda p: p != target, pieces)) return (target, remaining_pieces) for (to_x, to_y, required_piece) in moves: (piece, available_pieces) = get_available_piece(required_piece, available_pieces) # Offset of the game screen within a window + offset of the cell + center of the cell move_from = (board.x + piece.x + piece.w/2, board.y + piece.y + piece.h/2) move_to = (board.x + to_x + piece.w/2, board.y + to_y + piece.h/2) print('Moving', move_from, move_to) self.controls.left_mouse_drag( move_from, move_to )get_available_piecetakes the first one from the vision’s set of pieces, and uses that as a source for the solution.As for handling coordinates, one thing to not forget is that coordinates point to the top left corner of the corner, and are not always absolute in relation to the OS screen. E.g. a piece’s
xcoordinate is relative to the game screen’sxcoordinate, so to find its absolute coordinate we need to sum the two:absolute_x = board.x + piece.x.Top left corner of the piece is also not always usable - the game may not respond. However, if we target the center of the cell - that works reliably. So we offset the absolute coordinate with half of the cell’s width or height:
absolute_x = board.x + piece.x + piece.width.Finally running the bot!
Now we have all the tools for the bot to solve basic puzzles of Puzlogic. The last remaining piece is to build a
run.pyscript putting it all together:from puzbot.vision import ScreenshotSource, Vision from puzbot.bot import Bot from puzbot.solver import Solver from puzbot.controls import Controller source = ScreenshotSource() vision = Vision(source) solver = Solver() controller = Controller() bot = Bot(vision, controller, solver) print('Checking out the game board') bot.refresh() print('Game board:', vision.get_cells()) print('Game pieces:', vision.get_pieces()) print('Calculating the solution') print('Suggested solution:', bot.get_moves()) print('Performing the solution') bot.do_moves()Now we can run the bot with
python run.py, making sure that the game window is also visible on the screen. Here’s a demo video:You can see that the bot needs human help to get through the interfaces, and it can only solve puzzles by itself. Even then, it is able to resolve the first 4 basic puzzles, and just by chance is able to solve the 5th one, as it contains sum constraints - right now the bot cannot handle sum constraints in vision. So it does fail on the 6th puzzle.
Full code mentioned in this post can be found on Github: flakas/puzlogic-bot - bot.py, flakas/puzlogic-bot - controls.py.
If you are interested in the full project, you can also find it on Github: flakas/puzlogic-bot.
-
Adding basic vision - Part 2 of Solving Puzlogic puzzle game with Python and OpenCV
In the previous post we looked into building a basic solver of the Puzlogic puzzle. Now let’s take a look at creating the Vision component of the bot.
The vision component needs to be able to:
- Identify the game board, which cells are already filled in, which ones may have pieces placed into them;
- Identify the set of available pieces a level provides;
- Identify values of the available pieces and filled-in game cells.
Planning
As before, we’ll use
OpenCVfor vision,mssfor taking screenshots of the window, andPillow(fork ofPIL) to convert screenshots into OpenCV compatible images. For character recognition of piece values we’ll usePytesseractbindings forTesseract.We’ll implement
get_game_board(),get_cells()andget_pieces()public methods, as well as a way to OCR piece values.Taking screenshots
Let’s start by building an easier way to campture screenshots of the window.
import cv2
import numpy as np
import time
import pytesseract
from PIL import Image
from mss import mss
from collections import namedtuple

class ScreenshotSource:
    def __init__(self):
        self.monitor = {'top': 0, 'left': 0, 'width': 1920, 'height': 1080}
        self.screen = mss()
        self.image = None

    def get(self):
        if self.image is None:
            self.image = self.refresh()

        return self.image
Here I’m hardcoding the monitor’s dimensions to 1920x1080 - the common Full HD screen. It would be better to pass it in as a constructor argument, but for now that’ll do.
getmethod will be used to return the screenshot for further processing. It will be taking the screenshot of the full screen, including OS toolbars, browser window and hopefully game window. Image itself will get cached for improved performance until we actually need to refresh the frame.def refresh(self): source_image = self.screen.grab(self.monitor) rgb_image = Image.frombytes('RGB', source_image.size, source_image.rgb) rgb_image = np.array(rgb_image) bgr_image = self.convert_rgb_to_bgr(rgb_image) return bgr_image def convert_rgb_to_bgr(self, img): return img[:, :, ::-1]We take a screenshot with
mss, convert the binary output to RGB withPIL, then convert the RGB (Red, Green, Blue) image into BGR (Blue, Green, Red) color space. This is important, as OpenCV internally works with BGR images.RGB to BGR conversion works by keeping X and Y coordinates the same (first two arguments), but reversing the order of the third timension, turning RGB values into BGR.
Finding game area
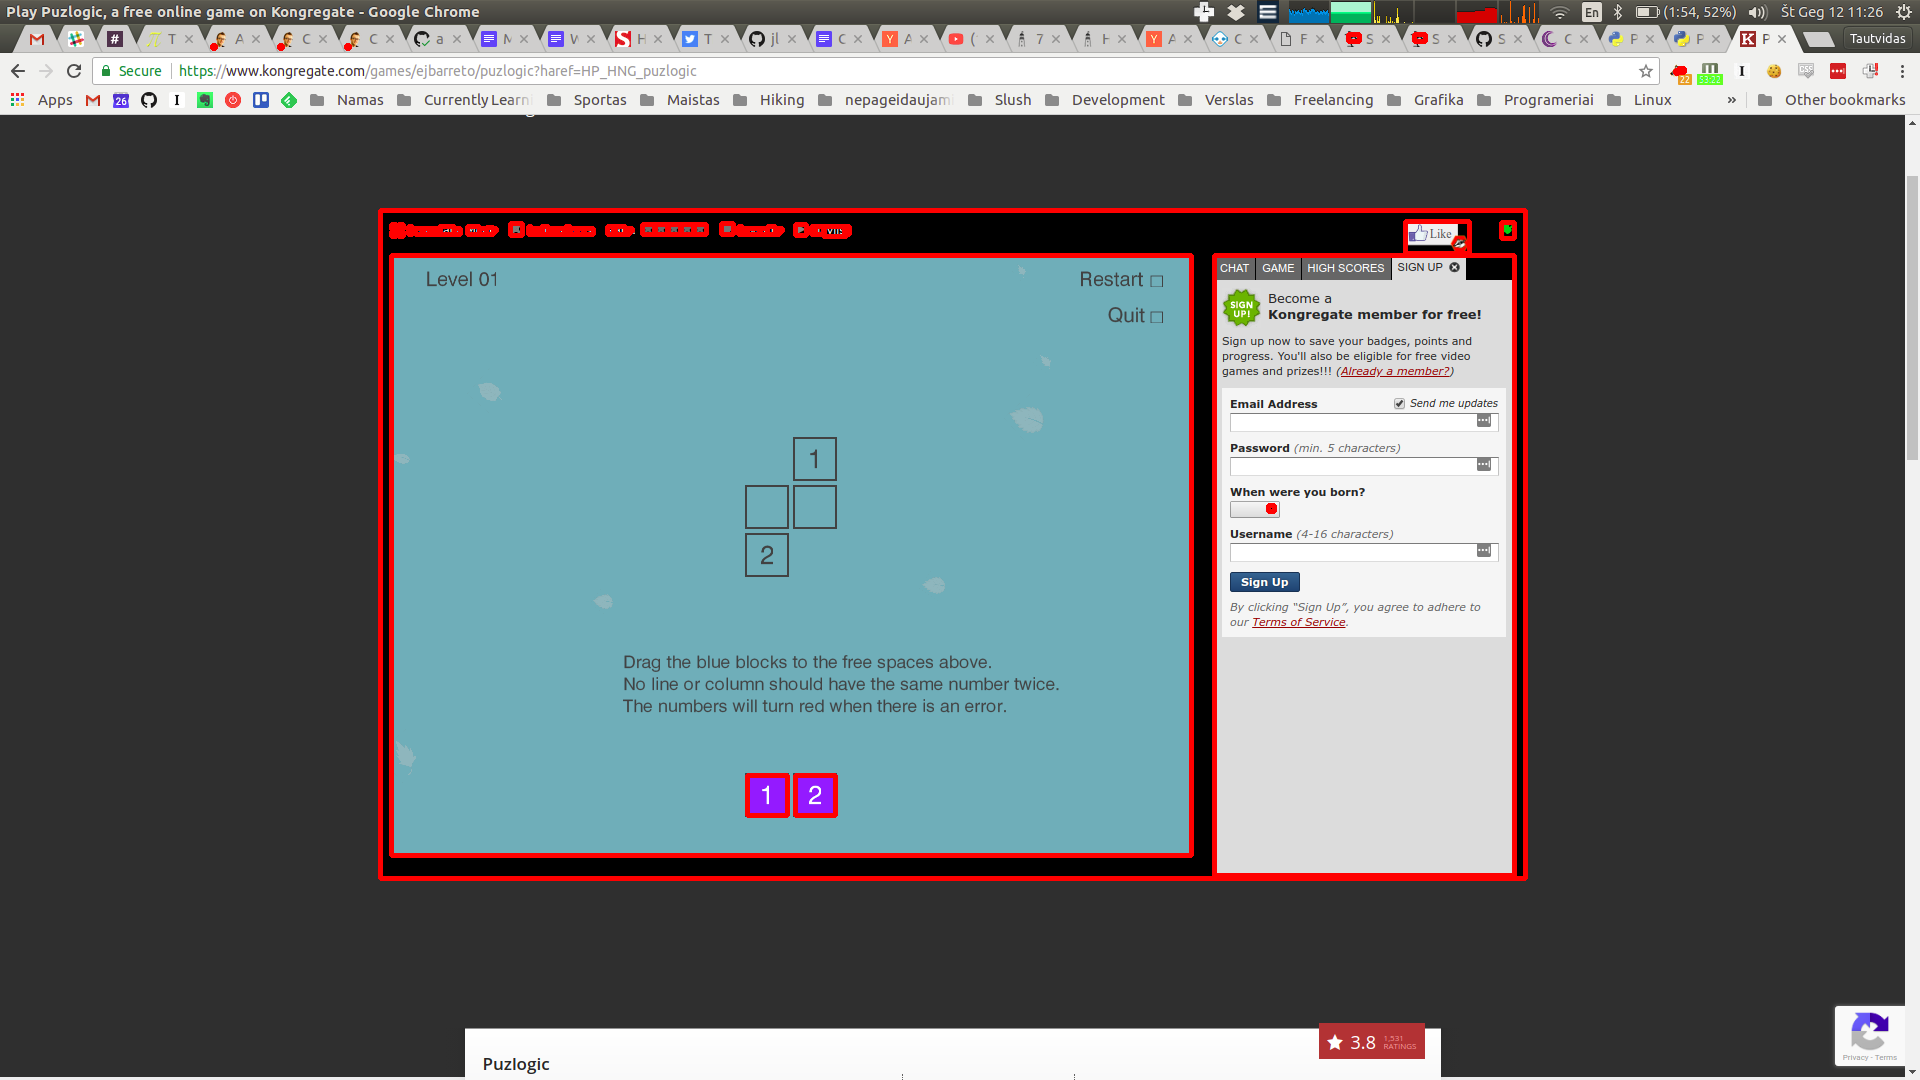
Now that we have the screenshot in bot’s memory, we can start by identifying where within the window game area is.
class Vision:
    def __init__(self, source):
        self.source = source

    def get_game_board(self):
        """ Detects the game window area within a computer screen """

        screen_image = self.source.get()
        original_screen_image = screen_image.copy()
        grayscale = cv2.cvtColor(screen_image, cv2.COLOR_BGR2GRAY)

        # Find black background around the game screen
        ret, mask = cv2.threshold(grayscale, 1, 255, cv2.THRESH_BINARY)
        binary_grayscale = cv2.bitwise_not(mask)

        # Eliminate noise and smaller elements
        kernel = cv2.getStructuringElement(cv2.MORPH_CROSS, (3, 3))
        dilated = cv2.dilate(binary_grayscale, kernel, iterations=1)

        _, contours, _ = cv2.findContours(dilated, cv2.RETR_LIST, cv2.CHAIN_APPROX_SIMPLE)

        Board = namedtuple('Board', ['x', 'y', 'w', 'h', 'screen'])

        for contour in contours:
            # get rectangle bounding contour
            [x, y, w, h] = cv2.boundingRect(contour)

            # Discard small pieces, we're looking for a game window roughly 800x600
            if w < 700 or h < 500 or w > 800:
                continue

            cropped = original_screen_image[y:y+h, x:x+w]

            return Board(x, y, w, h, cropped)

        return False
The basic idea is to turn the image into binary grayscale for easier management (pure white or pure black, turns the 3D array into 2D one), run a dilation kernel on the full image to eliminate smaller elements and noise (as that increases the number of contours), and then look for a rectangular contour that is close in size to the target game area (800x600 px).
-
We start with the original image.
-
Turn the image to grayscale color space.

-
Further simplify the image to binary grayscale, doing so eliminates most of the tiny details.

-
Dilation further decreases the size of small details. Now we can start looking for contours.
-
As you can see, it finds quite a few contours, that’s why I tried to simplify the image as much as possible.
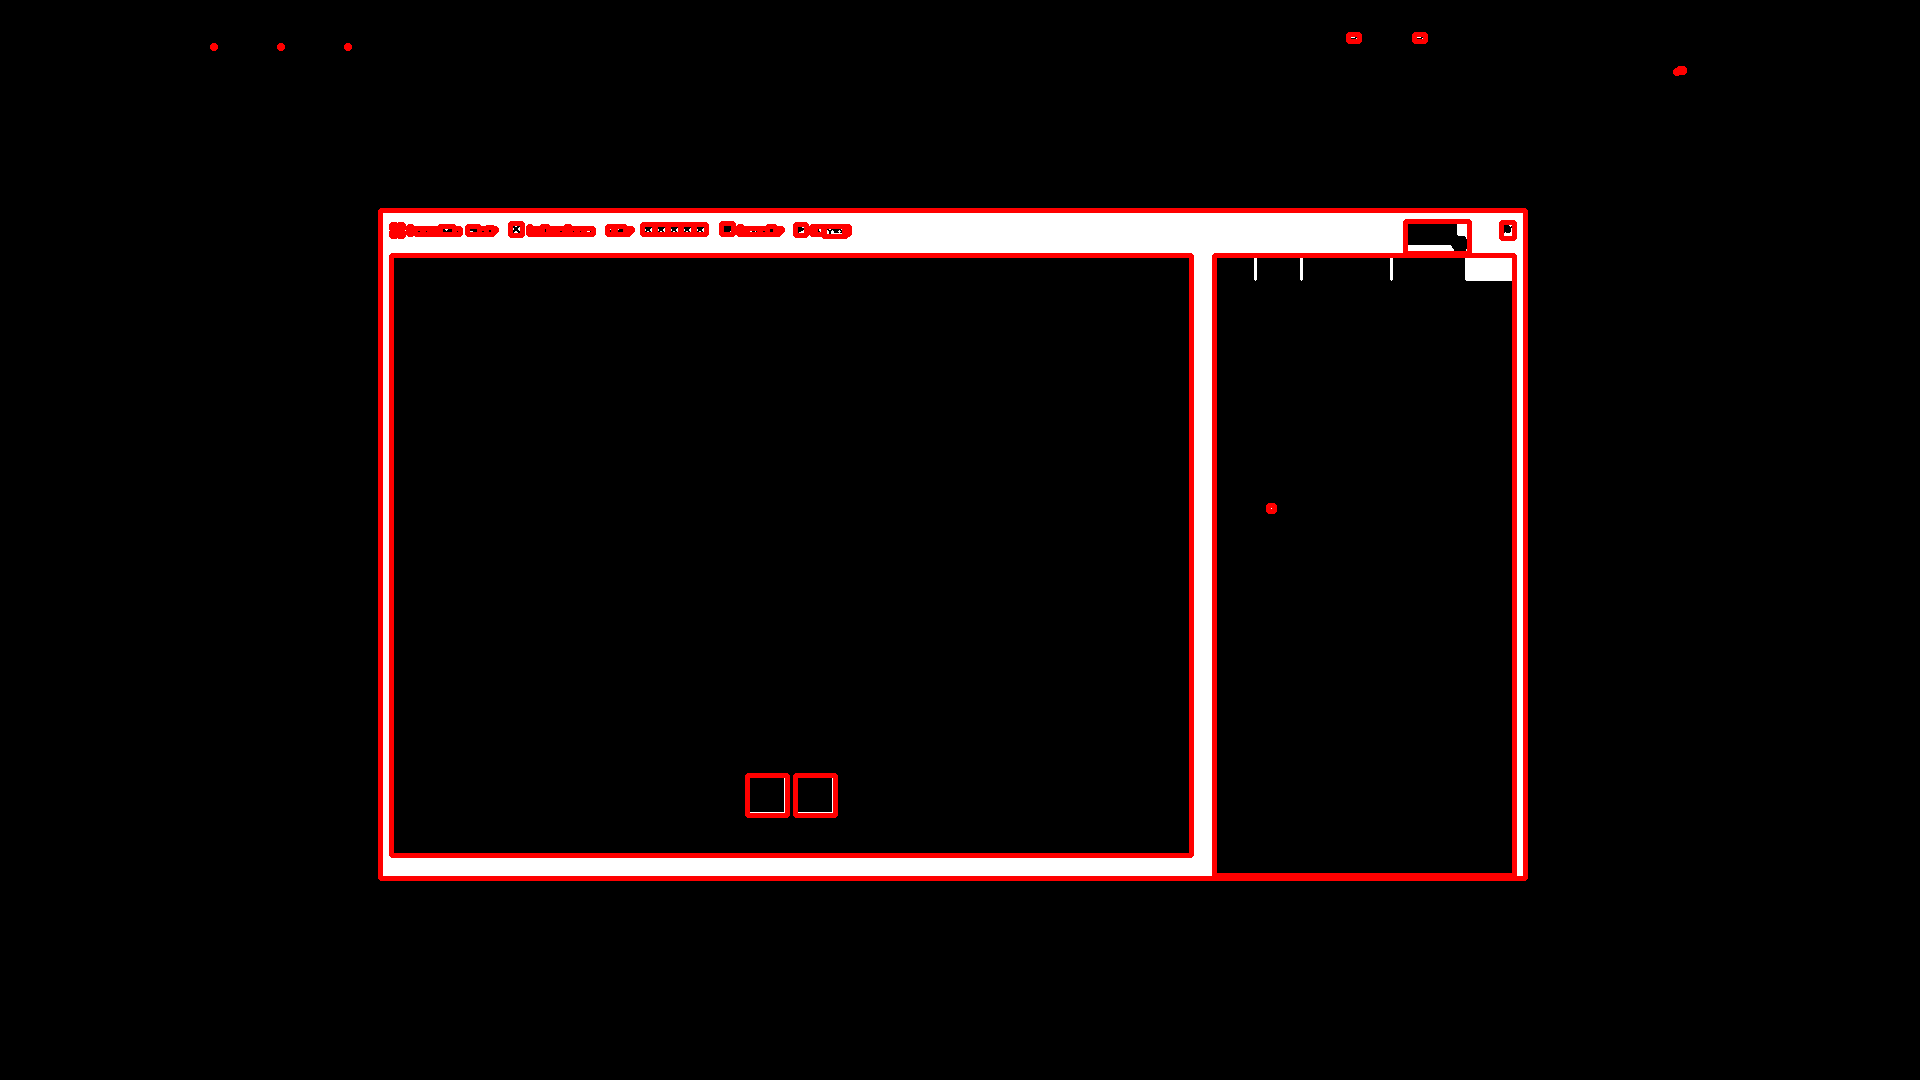
-
Further filtering by bounding box’s dimensions allows to identify the game screen, as pictured above.
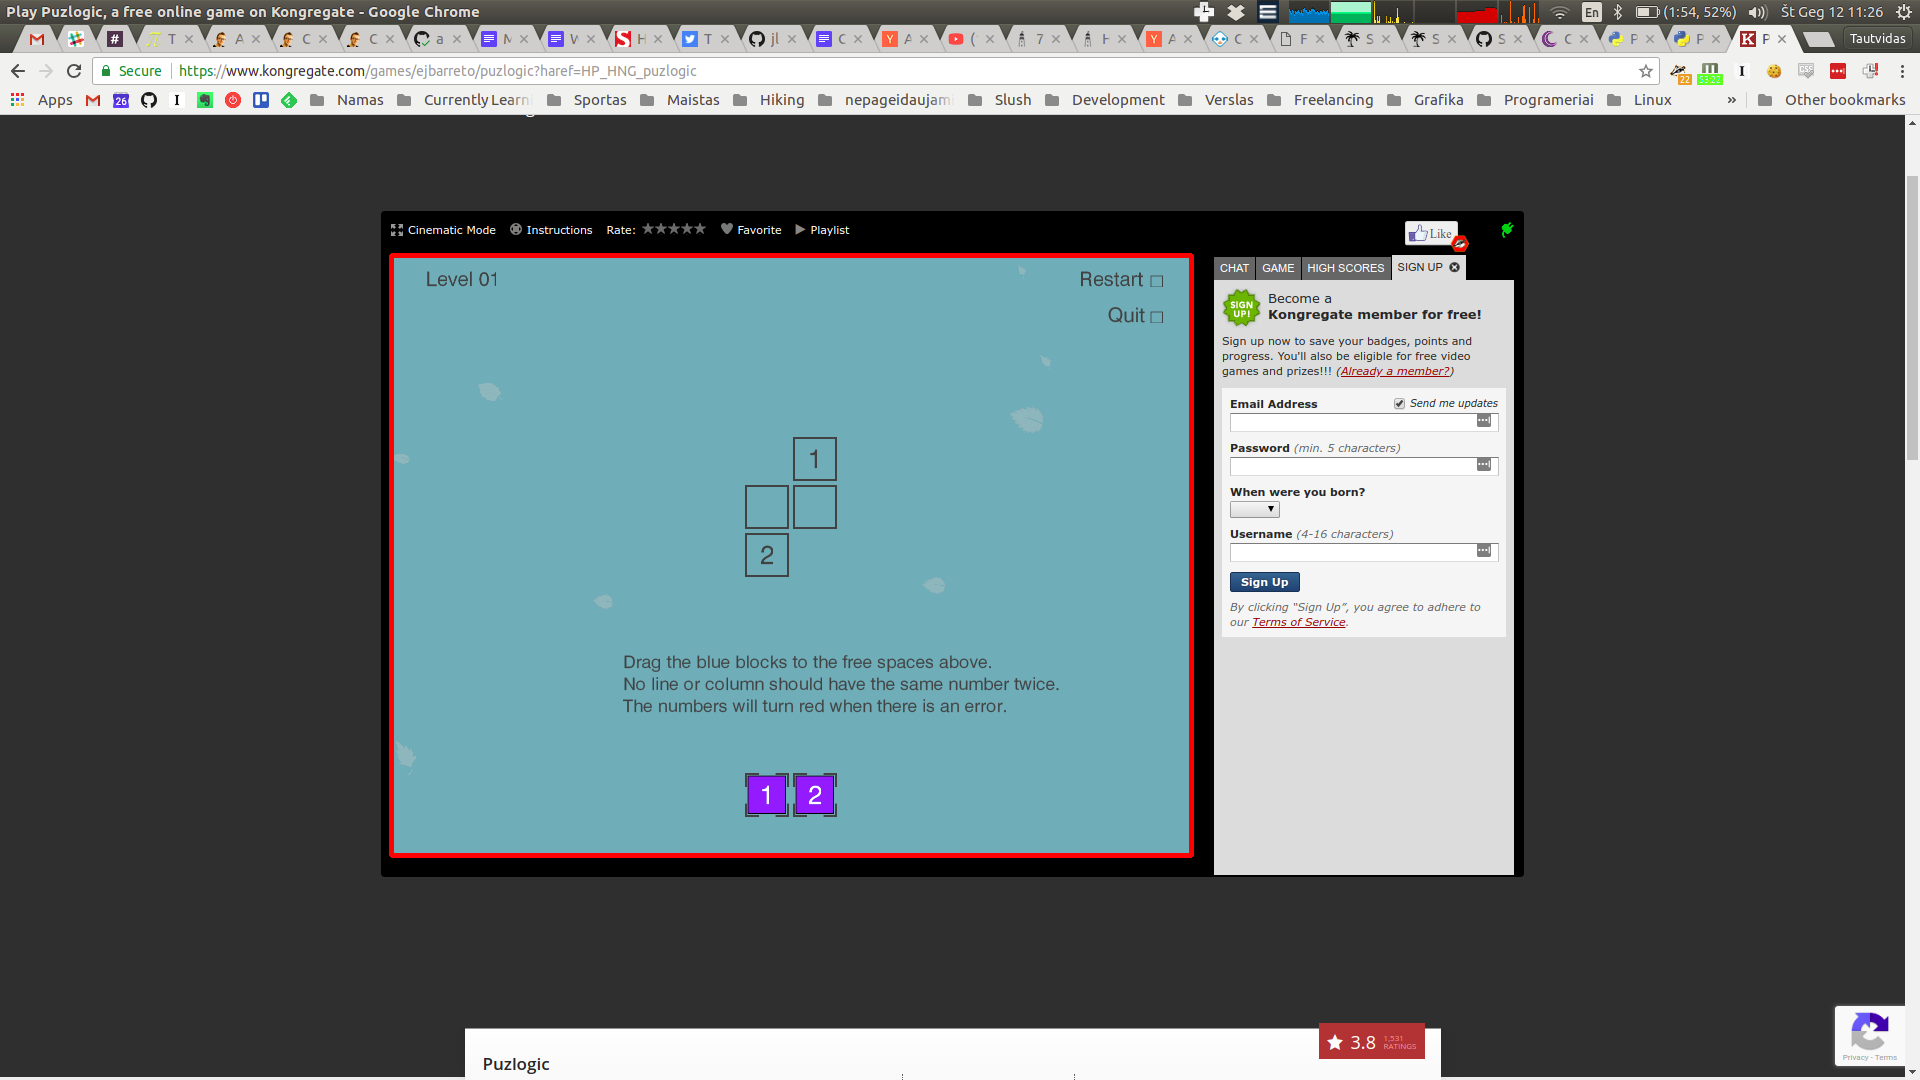
-
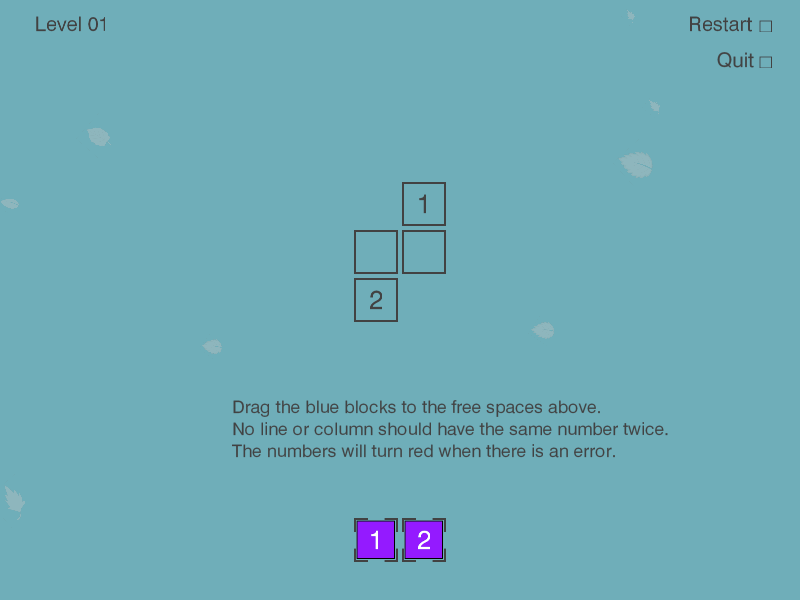
And here it is cropped to a useable image for further processing:

The final result for this image is:
Board(x=391, y=255, w=800, h=600, screen=np.array(..., dtype=uint8))Lastly, for future processing we take only the area that actually is the game screen. We can ignore the rest of the screen for vision purposes, but we still have to keep in mind offsets of the game area to allow us control mouse movements later.
Finding all cells
Now that we have the game area as a cropped image, we can start looking for game cells within it. Both the game board (are where game pieces should be placed), as well as the pieces themselves are squares of a similar size, just colored slightly differently. So we can write the same method to look for all cells, and then separate target cells from game pieces.
The pattern is similar:
- Convert image to binary grayscale
- Dilate to eliminate some of the noise
- Find all contours, filter them to ones roughly matching the target size
def get_visible_cells(self):
    board = self.get_game_board()

    grayscale = cv2.cvtColor(board.screen, cv2.COLOR_BGR2GRAY)

    ret, mask = cv2.threshold(grayscale, 100, 255, cv2.THRESH_BINARY)
    binary_grayscale = cv2.bitwise_not(mask)

    # Erase smaller artifacts on screen, hopefully leaving only
    # larger contours to detect.
    kernel = cv2.getStructuringElement(cv2.MORPH_CROSS, (3, 3))
    dilated = cv2.dilate(binary_grayscale, kernel, iterations=1)

    _, contours, _ = cv2.findContours(dilated, cv2.RETR_EXTERNAL, cv2.CHAIN_APPROX_SIMPLE)

    Cell = namedtuple('Cell', ['x', 'y', 'w', 'h', 'content'])

    # [x, y, w, h, img]
    bounding_boxes = map(lambda c: list(cv2.boundingRect(c)), contours)
    candidates = filter(lambda b: 40 < b[2] < 60 and 40 < b[3] < 60, bounding_boxes)
    cells = map(lambda c: Cell(c[0], c[1], c[2], c[3], self._recognize_number(board.screen[c[1]:c[1]+c[3], c[0]:c[0]+c[2]])), candidates)
    return list(cells)
I’ve set contour sizes for cells to be bigger than 40px, but smaller than 60px. It was done mostly by trial and error. I think the actual size of the game piece is around 48px, but the game cell is slightly bigger, and we’ve done some dilation as well.
To calculate
cells, we crop the source image based on coordinates of the countour’s bounding box, taking box’s width and height into account. Note that here I’m also usingself._recognize_number(...)call, which does OCR of cell’s contents, turning it into an actual number, or returningFalse. We’ll get to it in a minute.-
It all starts with the full game screen.
-
This is how it looks like after turning the image into a binary grayscale image with some dilation. You can see that most of the details have been almost eliminated.
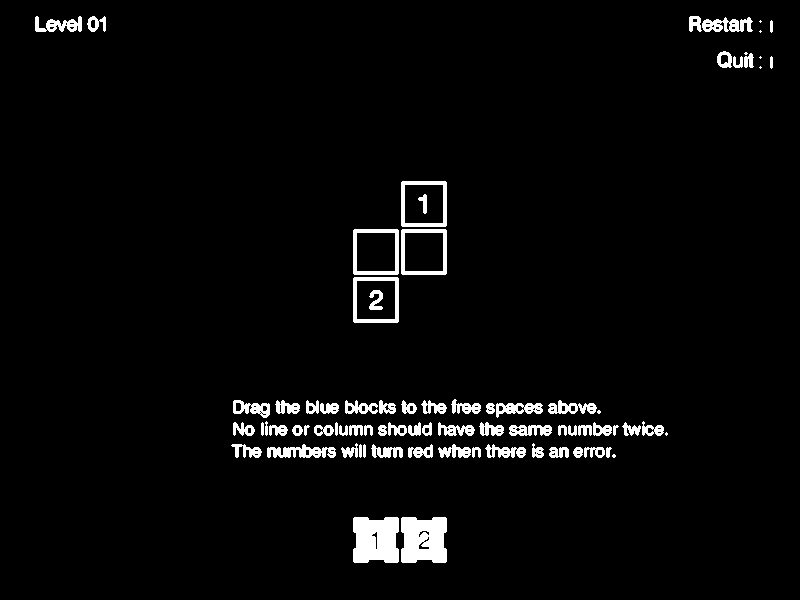
-
We find all contours and filter them based on expected contour dimensions. After some trial and error that leaves only the cells.
Method’s result for this picture is:
[
  Cell(x=401, y=517, w=46, h=46, content=2),
  Cell(x=353, y=517, w=46, h=46, content=1),
  Cell(x=353, y=277, w=46, h=46, content=2),
  Cell(x=401, y=229, w=46, h=46, content=False),
  Cell(x=353, y=229, w=46, h=46, content=False),
  Cell(x=401, y=181, w=46, h=46, content=1)
]
You can see that it was able to find all game board cells as well as all game pieces.
Finding game pieces
Now that we have all the cells identified, we can use this information to figure out which ones are game cells.
On different maps there may be different number of pieces provided in different arrangements, e.g. two rows with different number of pieces, two rows with same number of pieces, one row of pieces.
The common theme I saw in the first few levels was there were at most 2 rows of pieces, so I’ll assume the same will hold for all levels in the game. The other nice thing is that the distance between the lowest game board cell and the highest piece is fairly big, which we can use to differentiate cells from pieces.
Based on that information, we can find the lowest cell in the set of cells and assume that it is actually a game piece. Furthermore, I’ll assume that anything vertically within 3 cell heights of the lowest cell is also a piece.
def get_pieces(self):
    cells = self.get_visible_cells()
    lowest_cell = max(cells, key=lambda c: c.y)

    # Expect available pieces to be lower than the lowest row of game board cells
    return list(filter(lambda c: abs(lowest_cell.y - c.y) < lowest_cell.h*3, cells))
With the original image this method will return:
[
  Cell(x=401, y=517, w=46, h=46, content=2),
  Cell(x=353, y=517, w=46, h=46, content=1)
]
Finding game board cells
Now that we have identified which cells are actually movable pieces, any other cell must then be a game board cell!
def get_cells(self):
    cells = self.get_visible_cells()
    pieces = self.get_pieces()

    return list(set(cells) - set(pieces))
Result of this method would be:
[
  Cell(x=401, y=181, w=46, h=46, content=1),
  Cell(x=353, y=229, w=46, h=46, content=False),
  Cell(x=353, y=277, w=46, h=46, content=2),
  Cell(x=401, y=229, w=46, h=46, content=False)
]
Recognizing digits within cells
Above we identified some cells, which may be game board cells, or game pieces. So the cell may contain a number, or it may not.
The procedure is similar to what we’ve done before, but there are some differences.
For OCR we will use Pytesseract bindings for Google’s Tesseract. Tesseract works best when we feed in images containing just black text on white background with as little noise and unnecessary elements as possible.
Due to that the first step is to remove the black border around the cell that some cells may have, as I found it would be easier for OCR to reliably recognize the digit.
Next the image needs to be converted to binary grayscale, as the cell may contain other colors (like purple background of the piece, colored background of the cells). At this point we should have either black text on white background, or white text on black background.
Previous steps may have made edges of any digits a little pixelated, so blurring the image should make the digit more solid and slightly bigger, giving a better chance for OCR to recognize it.
Last step before feeding the image to OCR, we need to make sure the image contains black text on white background. I tried feeding in white text on black background, but it didn’t work well, and at this point the image may contain black text on white background or vice versa.
To make sure the image is actually white text on black background, we check the color of the first pixel. If it is white (has a value of
255) - I assume that it’s black text on white background. But if the pixel is black (has a value of0), then I assume it’s white text on black background, so we have to invert image’s colors.Lastly we feed in the image to pytesseract and attempt to convert the result into an integer. The
--psm 10argument for Tesseract instructs that the image should contain just a single character inside. In other modes I found that Tesseract returned mostly unusable garbage.def _recognize_number(self, candidate_tile_image): """ Attempts to OCR the number within a game tile image """ borderless_image = candidate_tile_image[5:-5, 5:-5] grayscale = cv2.cvtColor(borderless_image, cv2.COLOR_BGR2GRAY) ret, mask = cv2.threshold(grayscale, 100, 255, cv2.THRESH_BINARY | cv2.THRESH_OTSU) binary_grayscale = cv2.bitwise_not(mask) # Blur to help text show up better for OCR ocr_image = cv2.medianBlur(binary_grayscale, 3) if ocr_image[0, 0] == 0: # OCR needs black text on white background black_text_on_white_background = cv2.bitwise_not(ocr_image) ocr_image = black_text_on_white_background # Use single-character segmentation mode for Tesseract character = pytesseract.image_to_string(ocr_image, config='--psm 10') try: return int(character) except: return False-
We start with the image of an isolated cell of the original game screen

-
This is how the cell looks like after turning it into a binary grayscale image and removing its borders. Note that background disappears as well.

-
Here’s how the image looks like after slight blurring. The digit looks slightly bolder, but it seems for this image blurring may not have been all that necessary.

-
Because the image was white text on black background, the last step was to invert the colors and feed the resulting black-on-white image into Tesseract for OCR.

And here is the final result of the method is:
1. A parsed integer digit.Performance tuning
Now that we have most of the basic vision done, we can run some tests on the actual game, and it does work. However, when performing such commands in rapid succession, it may take in the region of 10 seconds on my machine for all calls to respond.
Mostly because some calls use others, so there’s quite a bit of unnecessary re-processing happening. To improve the situation we’ll add basic caching: cache results of each class method for the given frame, clear out the cache on the next frame.
For caching I’ve used decorators. Set a
cacheproperty dict on the object, adding return values to the cache when computation happens.def cache_until_refresh(func): def wrapper(self): if func in self.cache: return self.cache[func] result = func(self) self.cache[func] = result return result return wrapper class Vision: def __init__(self, source): self.source = source self.cache = {} def refresh(self): self.cache = {} self.source.refresh() @cache_until_refresh def get_game_board(self): # ... @cache_until_refresh def get_pieces(self): # ... @cache_until_refresh def get_cells(self): # ... @cache_until_refresh def get_visible_cells(self): # ...Now instead of having to wait for full results 10 seconds, the response comes in under 2.
Closing thoughts
So now we have a basic way to identify the game area, know which pieces are available, where are the target cells for game pieces, as well as which number each cell has.
Of course, the methods used above are quite brittle, at least as implemented here. Changes in UI, scaling, adding more complex or just other elements may easily break the bot. But, you can also see how powerful these simple-once-abstracted techniques are: convert to grayscale, dilate/blur, find contours/bounding boxes and one can identify objects without providing a reference picture of it. A more sophisticated approach than image pattern matching in Burrito Bison bot I wrote about previously.
If you are interested in the full code mentioned in this post, you can find it on Github - vision.py. The full project’s code, possibly in a further state of the project, can be found on Github - flakas/puzlogic-bot
In the next post we’ll look into adding Mouse controls and tying it all together to get the bot to actually solve several puzzles. A demo video shall follow too.